tmsConneXion v3 Upgrade
Summary
This document outlines the changes made with the tmsConneXion v3 upgrade.
Home Screen Changes
The Pin Feature
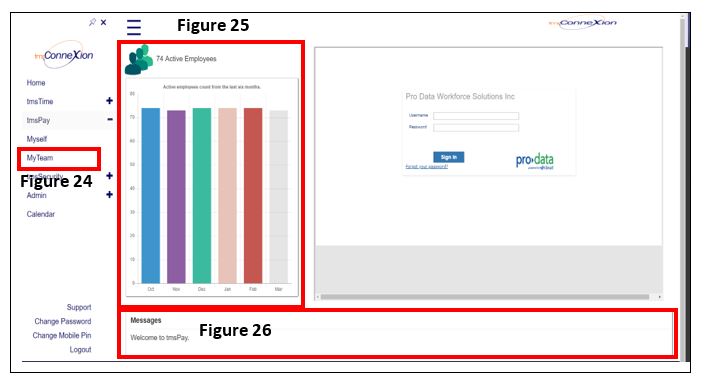
The Pin feature was added as a convenient way to keep the hamburger menu open at all times, no matter which screen you are in within tmsConneXion. To activate the Pin, open the menu and simply click on the tack (Figure 1). If the tack is blue, the menu is locked, if it is white, the feature is turned off. Even with the Pin on, you may close the menu by clicking on the X. The Pin will turn off automatically when the employee signs out.
Quicker Access to Employee Portal and Manager Portal
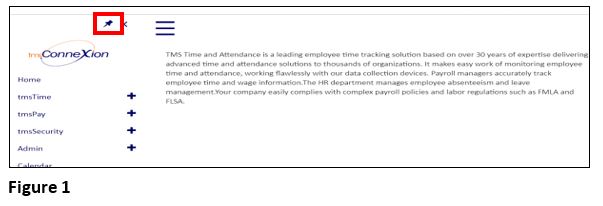
Previously, to access Employee Portal and/or Manager Portal, employees would have to click on tmsTime and then either Employee Portal or Manager Portal.
- If your employee’s Role is set to Employee (only), click on tmsTime (Figure 2), they will go directly into Employee Portal.
- If an employee’s Role is set to Manager (only), click on tmsTime (Figure 2), they will go directly into Manager Portal.
- If employee’s role is set as Manager/Employee, they will continue to see a sub-menu with a both choices.
Calendar Changes
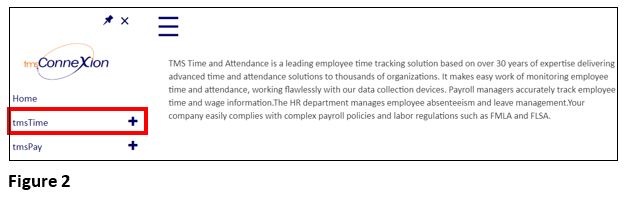
The Calendar (Figure 3) has been optimized and improved to load information faster. Employees will continue to see PTO requests and approvals from co-workers from their department on the calendar. However, anyone with the role of Employee/Manager will now have an option to select either their team or their co-workers (Figure 4).
Manage Home Tab Changes
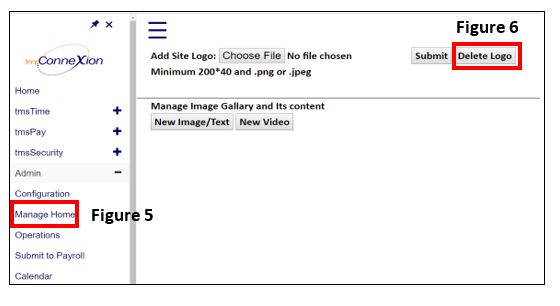
Previously, once a logo was on the home page there was no way to completely delete it; it could only be replaced with another logo. From Manage Home (Figure 5) there is now an option to delete as needed with the Delete Logo button (Figure 6).
Operations Tab Changes
New Look Operations Home Page
The Operations Home Page, visible to tmsConneXion admins, has an updated look. The page functionally remains the same.
New Features:
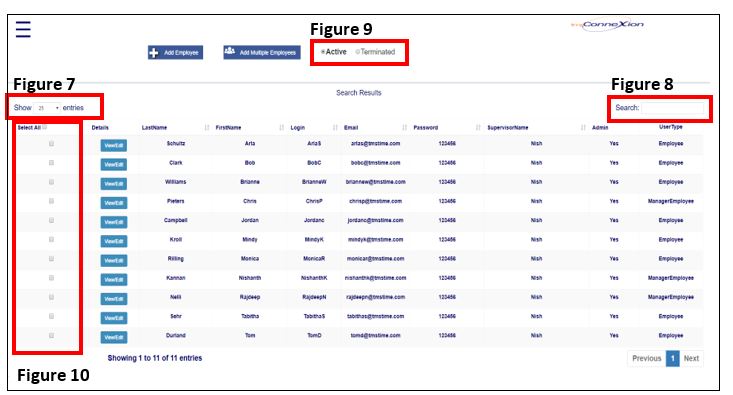
- Show # of Entries (Figure 7)
- Quick Employee Search (Figure 8)
- Filter By Employment Status (Figure 9)
- Quick Terminate and Activate (Figure 10)
Show # of Entries
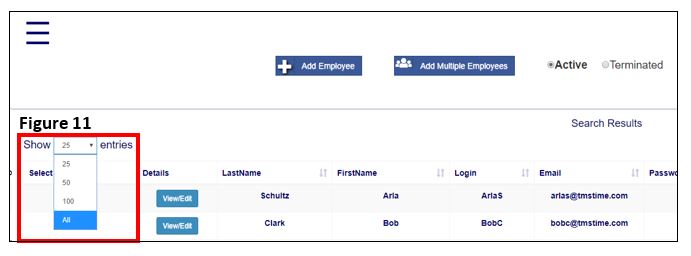
There is now an option to change the amount of employees you can scroll thru without the need to move to a new page. Click on Show Entries (Figure 11) to change between 25, 50, 75 or All employees.
Quicker Employee Search
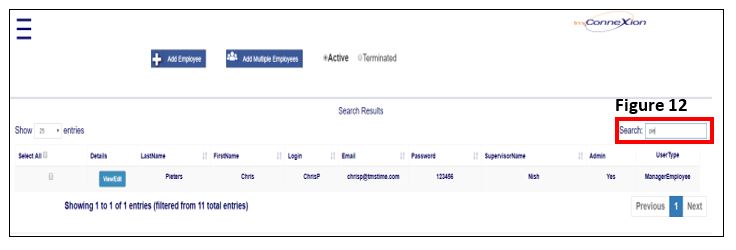
As you search for Active or Terminated employees, the Search box (Figure 12) will now reduce your list as you type in more of the employee’s name.
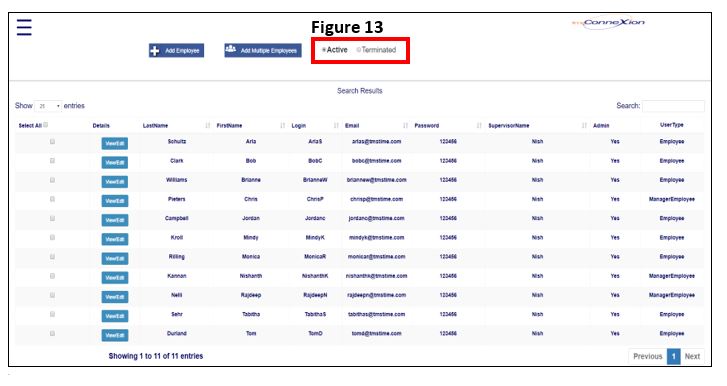
Filter By Employment Status
Administrators will now have the ability to search the employee list by Active or Terminated status. From Operations, the default search is set to Active; to see Terminated employees, select the radio button (Figure 13).
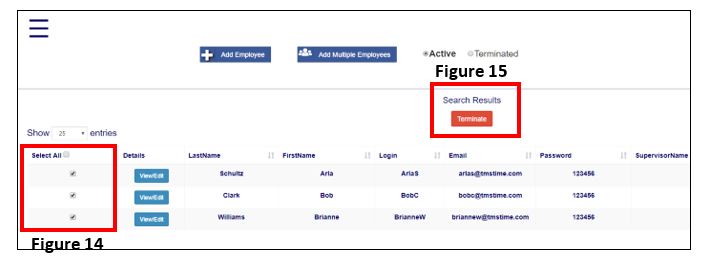
Quick Terminate/Activate
There is now an option to more efficiently terminate and activate employees. From the Operations home page, each employee will now have a check box in front of their name (Figure 14). To terminate employees, check the box and select Terminate (Figure 15); a Terminated Successfully box will pop up. These employees will now be considered Terminated and their Terminated Date will show accordingly. The employee will also move to the Terminated page.
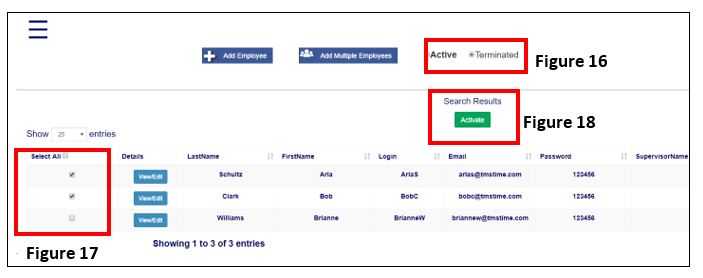
To Activate employees, change your filter to Terminated (Figure 16), select the employees you wish to activate (Figure 17) and click Activate (Figure 18). These employees will now be considered Active and their Activated Date will show accordingly. The employee will have now moved back to the Active list.
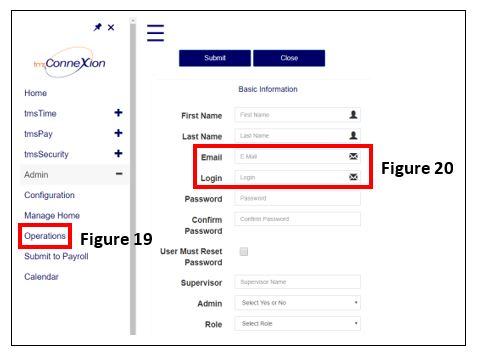
Email/Login Option
When Administrators are now adding new employees to tmsConneXion via Operations (Figure 19), they will have the option to set up both a login and an email address (Figure 20) for those with the Role of Employee (only). Previously, either a login or an email address needed to be chosen. This meant that if the employee used a login name and forgot their password, they would have to contact the Admin who had to reset it. Now a login name can be used and if the employee has access to email, this can also be used as well. This will allow employees to reset their own password and receive tmsConneXion notifications. Those employees with the Role of either Manager or Manager/Employee must still have an email address associated with their profile whereas those with the Role of Employee may have either one or the other or both. If you wish to edit an existing employee, chose View/Edit.
Changes to Employee Portal(ESS)
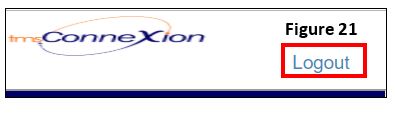
A Logout button (Figure 21) has been added to the upper right hand corner of Employee portal (ESS) that allows the employee to leave without opening the menu first (which is still available). This was added to increase employee efficiency and reduce the amount of time spent at a login terminal.
tmsPay
Pay Group Selection
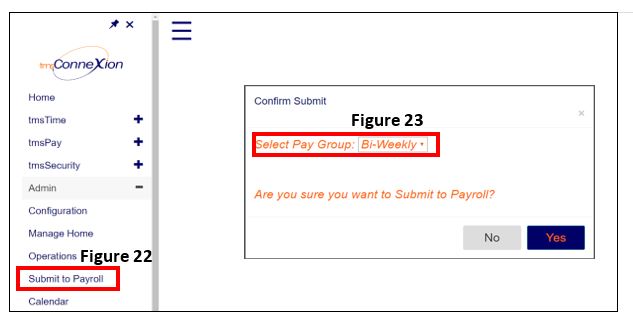
Once the Payroll Administrator selects the Submit to Payroll (Figure 22), the Confirm Submit box will give them the option to select a pay group (Figure 23). If there is only one pay period, it will be the only option shown in the dropdown menu.
MyTeam Home Screen
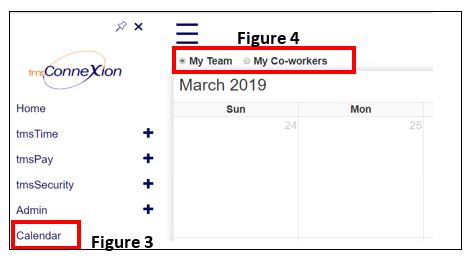
Upon selecting Manager Portal in tmsPay (Figure 24), a graph showing Active Employees for the prior 6 months (Figure 25) will display as will a Message area (Figure 26). The messages area will display payroll update information that TMS will send out.