How to Manually Cut a Check in tmsPay
Summary
This document addresses work instructions for how to cut a manual check through tmsPay.
Some circumstances may necessitate cutting a manual check for an employee outside of a normal payroll.
To Cut a Manual Check via tmsPay
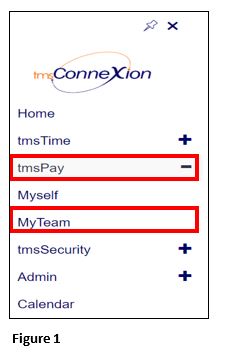
1. From the tmsConneXion menu, select tmsPay and MyTeam (Figure 1).
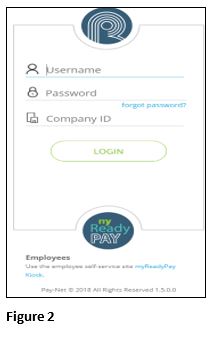
2. Log in with the User Name, Password and Company ID (Figure 2).
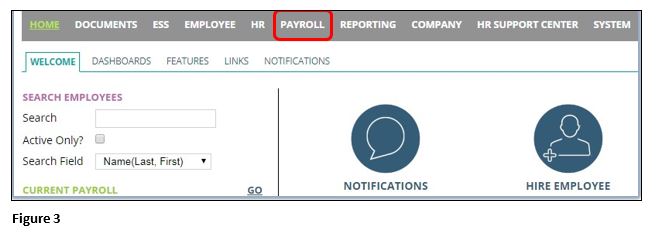
3. Click on the Payroll link in the gray navigation bar (Figure 3).
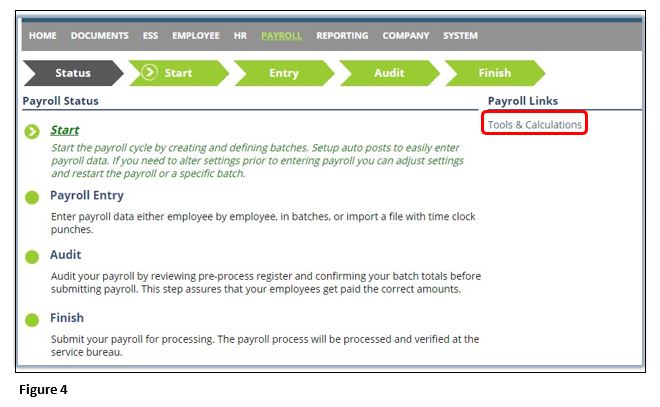
4. Click Tools & Calculations (Figure 4).
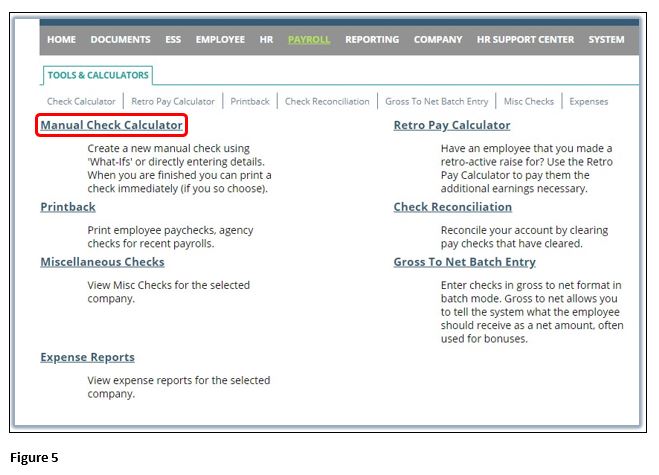
5. On the following screen, select Manual Check Calculator (Figure 5).
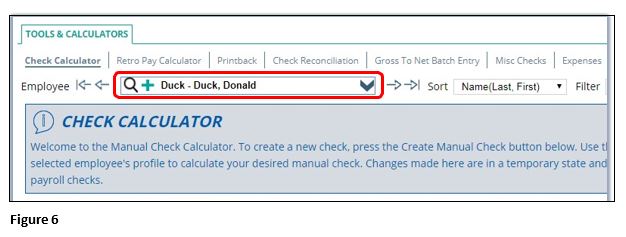
6. In order to begin the process of creating a manual check, verify that the correct employee is selected. The drop down menu at the top of the screen can be accessed to search for and select the employee (Figure 6).
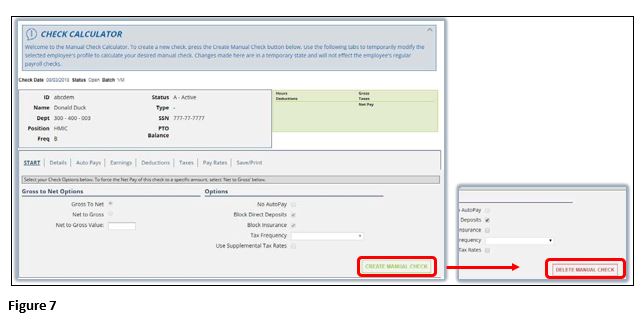
7. After selecting the correct employee, click the green CREATE MANUAL CHECK button. Note that on occasion your web browser may refresh faster than the system refreshes, so you may need to click this button more than once. When the button changes to a red DELETE MANUAL CHECK you will be ready to proceed (Figure 7).
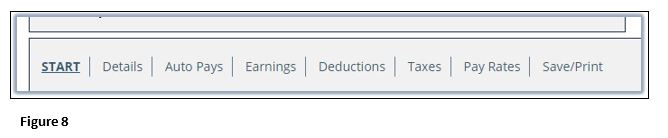
8. The manual check calculator is divided into several tabs: Start, Details, Auto Pays, Earnings, Deductions, Taxes, Pay Rates, and Save/Print. Depending upon the specifics of the check, you may only need to access some of these tabs (Figure 8).
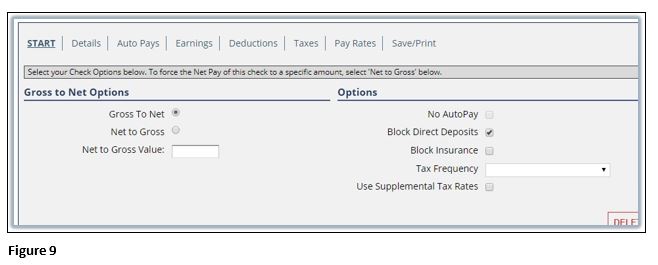
9. On the Start tab, generic options for the check will be available. These settings often do not need to be adjusted, but your specific circumstances may necessitate modify these settings (Figure 9).
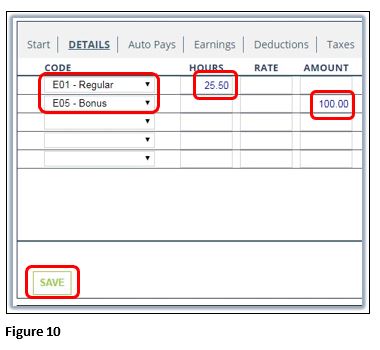
10. On the Details tab, enter any of the pay entries necessary for this check. As with standard payroll entry, select the necessary item from the drop down menus and enter the appropriate data. Remember to click the green SAVE button when complete (Figure 10).
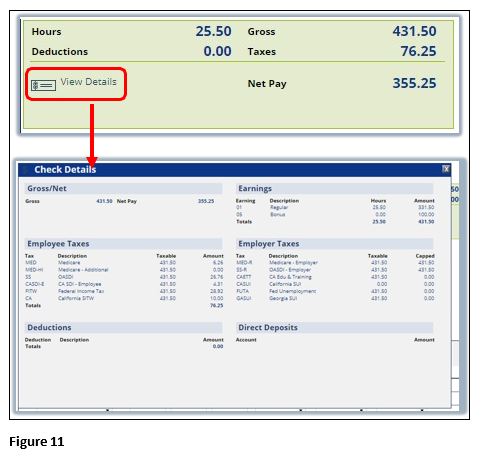
11. After saving your entries, the green box in the upper right will refresh with the check details. You may click on the View Details link for a more complete breakdown. Note that the “Net Pay” of the check is the actual amount the employee will receive.
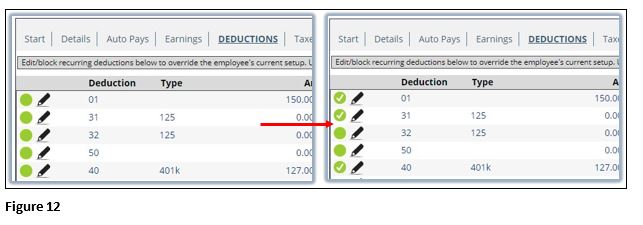
12. The Auto Pays, Earnings, Deductions, Taxes, and Pay Rates tabs all have options that can be turned on or turned off as necessary. It will often not be necessary to access these tabs, but your circumstances may necessitate otherwise. By default, earnings and deductions will be disabled for manual checks. To turn them on, please click the green dot beside the necessary additions. The white checkmark indicates that the entry has been added (Figure 12).
13. After ensuring that all details are correct, you may proceed to the Save/Print tab. You may modify the period dates as appropriate, then select the appropriate bank account from the drop-down menu. If you have a check number, enter it in the following box (Figure 13). Critically, if you will be cutting a physical check from your own check book, a check number must be entered. If you do not enter a number in this box, the system will default to producing a physical check in the next payroll process.
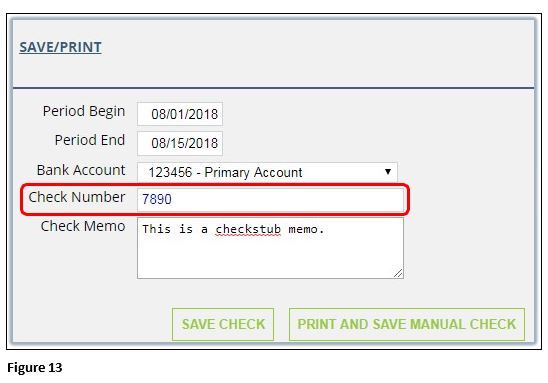
14. Lastly, clicking the SAVE CHECK button will save the manual check in the system to be recorded with the next payroll process. If you also need to either print the check and/or the stub, clicking the PRINT AND SAVE MANUAL CHECK button instead will record the check while also opening a PDF copy of the check in a new window. Only one of these buttons may be pressed.