How to Create and Maintain Users in tmsPay
Summary
This document outlines the steps necessary to create and maintain users on tmsPay’s Employee Self-Service Kiosk (ESS Kiosk).
To Create and Maintain Users
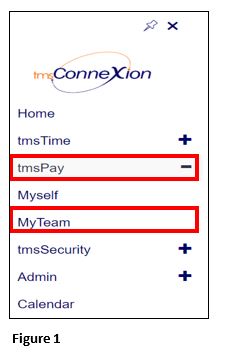
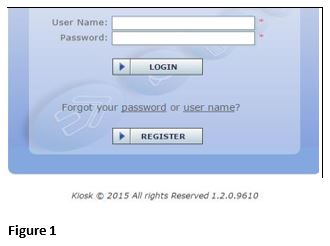
1. From the tmsConneXion menu, select tmsPay and MyTeam (Figure 1).
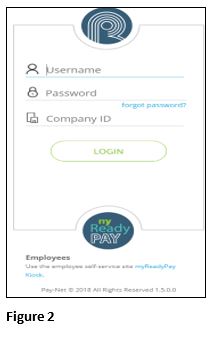
2. Log in with the User Name, Password and Company ID (Figure 2).
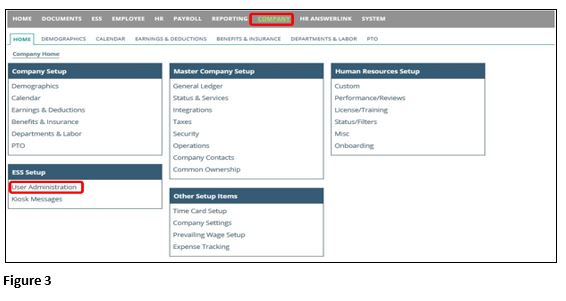
3. Click User Administration under the ESS Setup Section of the Company tab (Figure 3).
4. Navigate to the employee you wish to edit by clicking the next to their Employee ID/Name in the blank space (Figure 4). From here, you can Create a new user account, or Invite the employee to self-registration (where the employee can choose their own username, etc.).
To Create a new user account, simply fill in the fields as prompted, and click “Create User”, but REMEMBER:
a) ALWAYS leave the “User must change password?” box checked
b) ALWAYS leave the Security Role as “Employee”. (Changing a user to “Administrator” will allow the employee to add other users and see other employees in the kiosk.)
c) ONLY check the “Email verified?” box if it is an email you know is valid AND you don’t want the employee to verify the email address entered.
To Invite an employee to self-registration, first ensure an email address has already been entered for the selected employee.
d) Then, simply click the envelope icon next to the email you prefer to attach the user login to. The employee will be sent an email with instructions to complete registration.

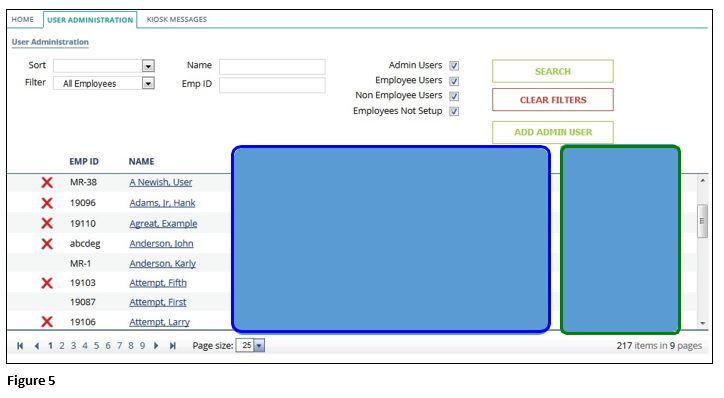
5. Once you’ve created or invited a user, you can always see if they’ve completed registration, and see if they’ve signed up for electronic Pay Stubs, W2s, and/or ACA Reporting Forms (if applicable) (Figure 5).
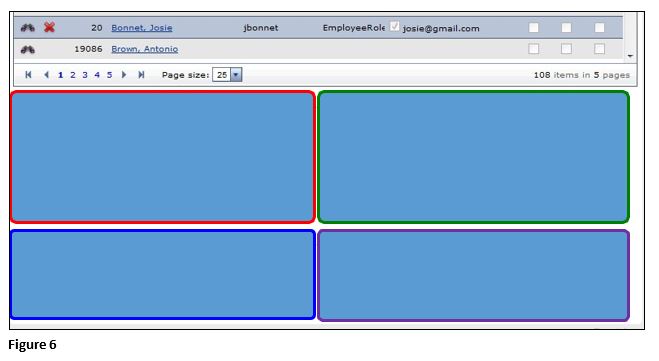
6. Also, once a user has been created (either by an admin user, or through self-registration), you can always perform the following actions: Disable User, Change Password, Change Email, Change Security Role (Figure 6).
Registration for the Employee Kiosk
1. You will receive an e-mail inviting you to register in the employee kiosk. If you do not receive an email invitation, please be sure to check your spam folders. Please click on the link in the e-mail.
2. Once you click on the link in the e-mail please click the register button (Figure 1).
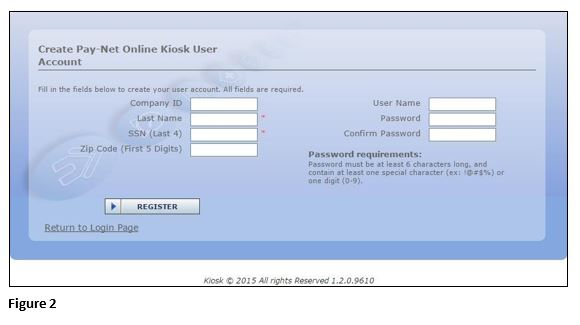
3. Next, please fill out the information on the registration screen. (Please note that your information must match what your employer has on file for you.) Click on the registration button in the bottom left when finished (Figure 2).
4. After registering, you will be asked for your e-mail address. After entering your e-mail address and clicking send, please go to your e-mail. You will receive an e-mail from support@pay-net.net. If you do not see it in your inbox please check your spam folders. Please click on the link in the e-mail to verify your e-mail address. After clicking the link in the e-mail, you will be brought back to the log in page.
To Receive Electronic Check Stubs in the Employee Kiosk Instead of Printed Check Stubs
1. Once you log into the kiosk, please follow the instructions below to enroll in the electronic check stub option:
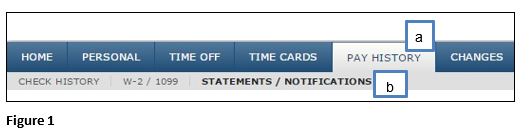
a). Select Pay History
b). Select Statements/Notifications (Figure 1)
c). Select the Click to Enroll tab
d). Select Click to Subscribe to receive e-mail notifications that your check stub is ready to view.
e). Select the View My Paystubs to view you pay stubs (Figure 2)