How to Hire an Employee and/or Vendor in tmsPay
Summary
This document outlines the steps necessary to hire an employee and/or vendor in tmsPay.
To Hire an Employee or Vendor
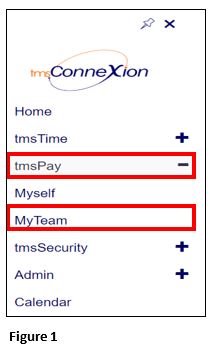
1. From the tmsConneXion menu, select tmsPay and MyTeam (Figure 1).
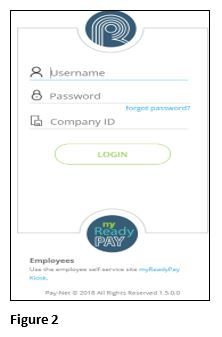
2. Log in with the User Name, Password and Company ID (Figure 2).
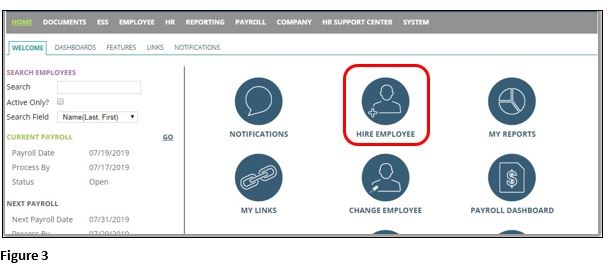
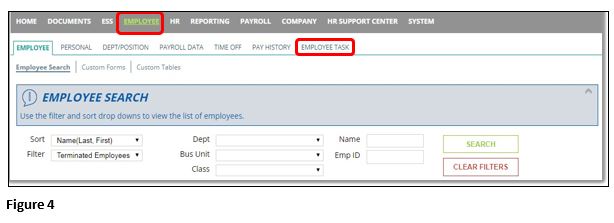
3. After logging into Pay-Net online click on the Hire Employee button (Figure 3), or click on the Employee tab. If you click on the Employee tab, please click Employee Task (Figure 4). You will then be on the Add Employee page.
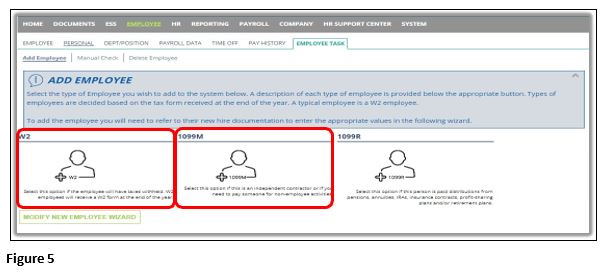
4. If they are a W2 employee select the W2 icon. If they are a 1099 employee/vendor select the 1099M icon (Figure 5). ***NOTE: Do NOT select 1099R!
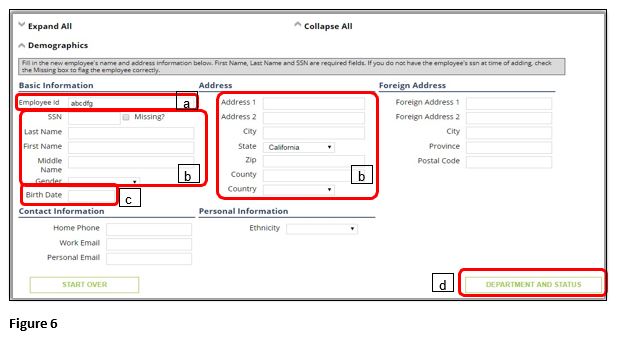
5. Complete the following on the Demographics Section: For W2 and 1099 (Figure 6).
a). The Employee ID will default to the next available number. This can be changed to a number, or letters, of your choosing as long as another employee, terminated or active, does not have this. You cannot change this later.
b) Fill in the applicable information, mainly Name, Gender, and Address. This information can be updated later.
c). If you have a 401K policy please fill in Birthdate as this will help with the age limits. This information can be updated later if you do not have it upon hiring.
d). Click Department and Status when you are done in this section.
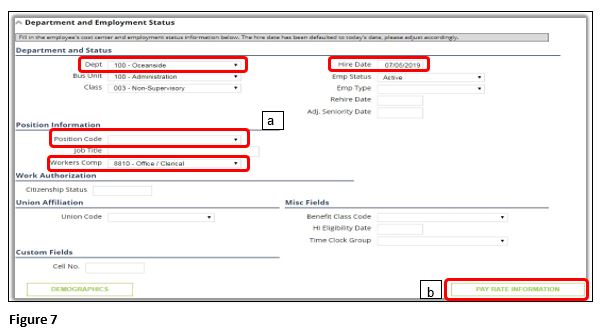
6. Complete the following on the Department and Status Section: For W2 and 1099 (Figure 7).
a). Not all of the information below will be listed on your company, but please fill in Department, Worker’s comp (If applicable), Position Code (If applicable), and Hire date if not the date populated.
b). Click Pay Rate Information when you are done with this section.
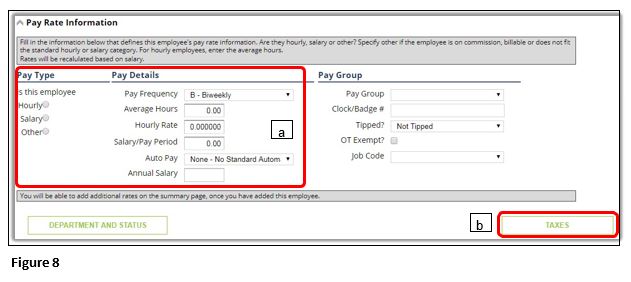
7. Complete the following on the Pay Rate Information: For W2 and 1099 (Figure 8).
a. Please fill out Pay Type and Pay Details. If they do not have a set rate as the dollar amount changes each time, please leave this blank. Fill out any applicable information.
b. Click Taxes when you are when you are done with this section.
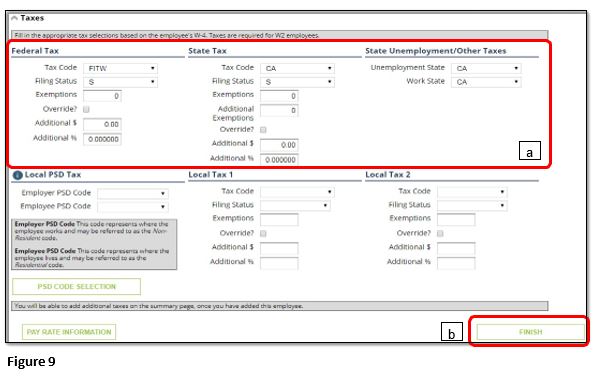
8. Complete the following for Taxes (Figure 9).
a. For W2:
i. Fill in the Filling Status and Exemptions for Federal Tax and State Tax, changing the State Tax Code, Unemployment State, and Work State as needed. Fill out Local taxes if applicable, usually New York will have this section.
***Note: If you have multiple states, please verify the state next time you hire an employee as it defaults to the last state you hired under.
ii. Click Finish when you are done with this section.
b. For 1099:
i. Leave this section blank and click Finish.
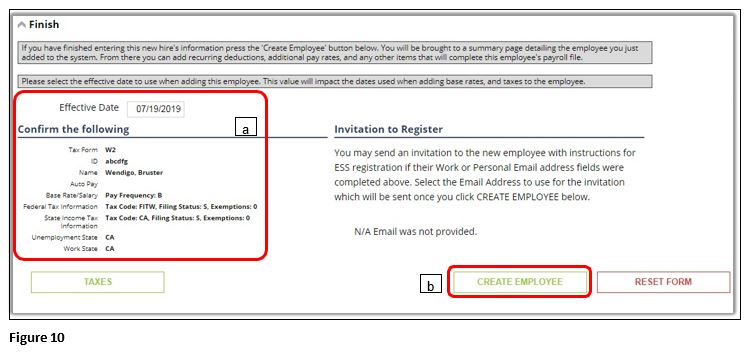
9. Complete the following to the Finish Section: For W2 and 1099 (Figure 10).
a. Verify the entered information listed. If you need to adjust anything, please scroll up and select the section in question.
b. Click Create Employee when done with everything.
10. If there is any missing information after clicking Create Employee that is required you will be directed to the top of the screen where there will be a message letting you know what information is missing. Go to the information in question and make changes, clicking the Finish Tab when done and click Create Employee again.
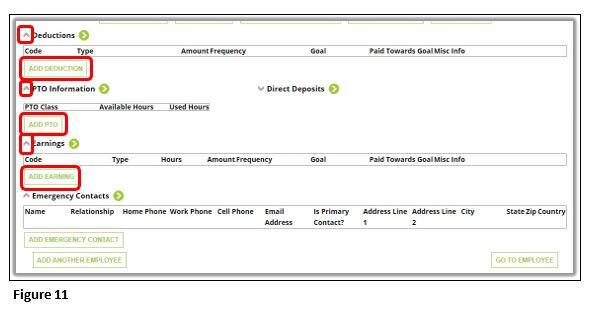
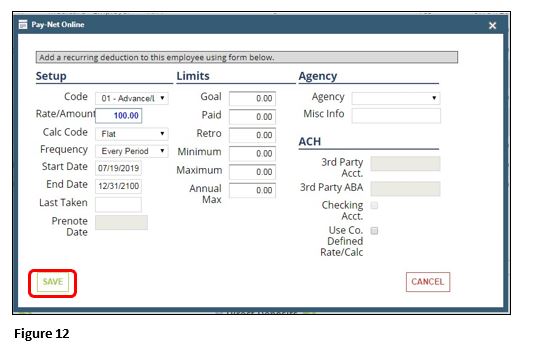
11. Upon completion you will be directed to the new employee’s Personal Tab. If you scroll to the bottom, you will see the tabs listed below. Click the grey arrow next to each tab that you need to add information to and click Add (Figure 11). A window should pop up for you to add the information. Click Save when done (Figure 12). Follow the same steps as needed, otherwise you are complete. ***Note: This option is only available at this moment after hiring. When you click off the page, you need to navigate to the tabs in question and add them there.