Onboarding for Employees Using tmsPay
Summary
This document addresses work instructions for onboarding for new hires using tmsPay.
New Hire Overview
Onboarding is where new hires register on the ESS (Employee Self Service) kiosk and begin filling out their information in the company’s software system. Any changes that need to be made to their information, along with any necessary new hire documents to fill out, will be made during this process. Onboarding is a simple, yet effective way to make sure that new hires have a seamless manner of being entered into the company’s payroll system.
How Employees Onboard
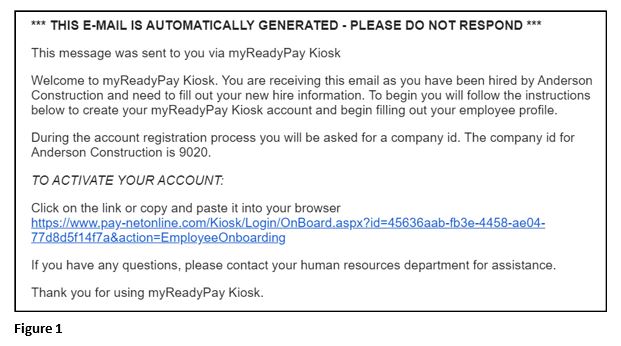
1. The employee will receive is an email from the company, letting them know that they have been selected as an employee, and to fill out their new hire information on the ESS kiosk (Figure 1).
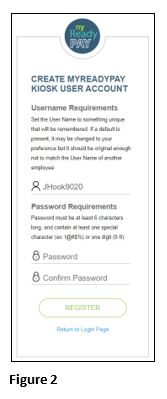
2. Once the employee receives the email, they will click on the link to open the ESS kiosk. They will need to register by making a password in order to access the company account (Figure 2). This will allow the new employee to log into their system.
3. Once the employee has logged in they will be taken to the Welcome screen where they will begin the onboarding tasks (Figure 3). The employee will need to go through each of the tasks, which are reflected on the left side of the screen. Detailed instructions for some of the tasks can be viewed by clicking on the magnifying glass icon next to Instructions on the top of the screen. Once each task has been completed, click on Save & Continue. Any task can be saved and revisited anytime by clicking on Save within that task and then clicking on any other task on the left side of the screen.
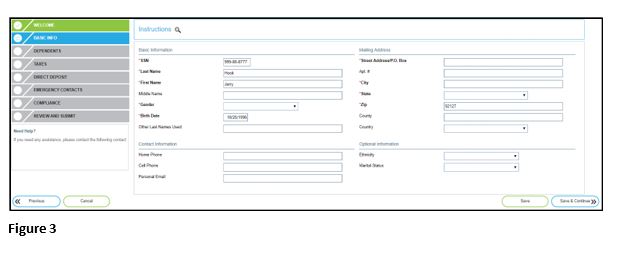
4. Within the Basic Info task, the sections which must be completed have a red asterisk (*) next to the box’s title. If applicable, the employee will fill out any dependents within the Dependents task (if no dependents, click on Next).
Listing dependents can be done by clicking on the hyperlinked Add Dependent in the top right of the screen and completing all of the sections.
Within the Taxes task, the Federal tax filing status, and any exemptions, if applicable will be selected (Figure 4). If the State tax elections are the same as your Federal elections, click on the blue hyperlinked Copy Federal elections to State, so the process doesn’t have to be completed twice.
After clicking Save, the employee may view their Federal W-4 tax form and their State tax form by clicking on the magnifying glass icons near the bottom of the page.

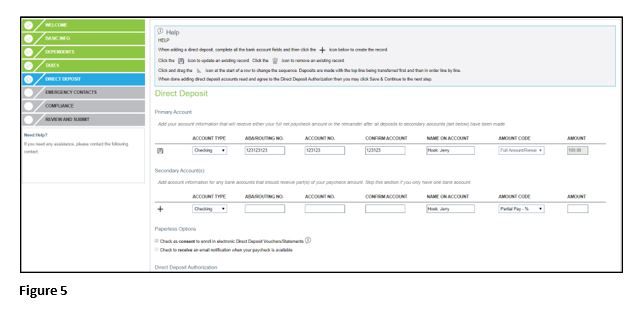
5. The Direct Deposit task can be either optional or required, based on the company’s requirements (Figure 5). Once the direct deposit information has been entered, the employee will need to click the plus (+) sign on the left side of the screen in order for the data to be added to the system. After all accounts have been added, the Direct Deposit Authorization agreement must be read and agreed to before proceeding to the next task. Within the Emergency Contacts task, click on the hyperlinked Add Contact in the top right of the screen and complete all of the sections which have a red asterisk (*) next to the box’s title.
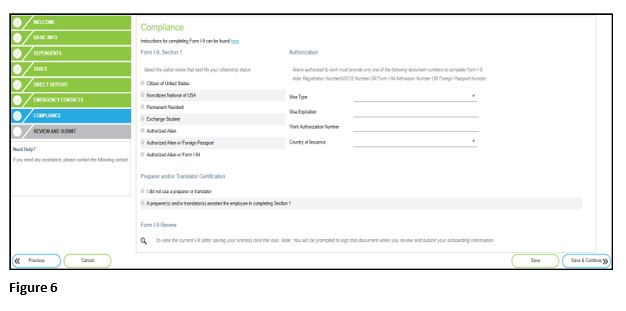
6. The Compliance task is where the I-9 Form is filled out (Figure 6). The employee should read the options and select the one which represents their status. After clicking Save, the I-9 Form can be viewed by clicking on the magnifying glass icon near the bottom of the page.
Please note that the I-9 Form completion task needed by the company will need to be completed within 3 business days of the first day of employment. A list of acceptable documents that must present to are listed at the bottom of this document.
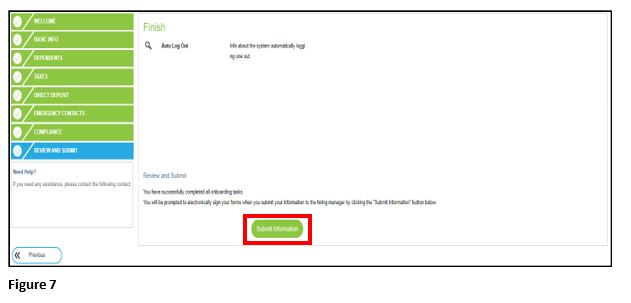
7. The final task, Review and Submit, is the reviewing of any documents, if applicable, and submitting the information for review (Figure 7). If any documents required by the company need to be reviewed the employee will need to click on the magnifying glass to the left of the document name.
If acknowledgment of reviewing a document is needed, the employee will need to click on the green box on the right side of the document. Once everything has been reviewed and completed, click on Submit Information.
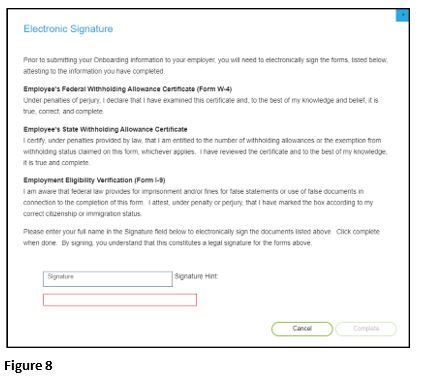
8. The next screen that pops up is an Electronic Signature page, which reflects all of the forms that will be electronically signed by the electronic submission (Figured 8). The employee will need to type their name into the Signature box, then select Complete.
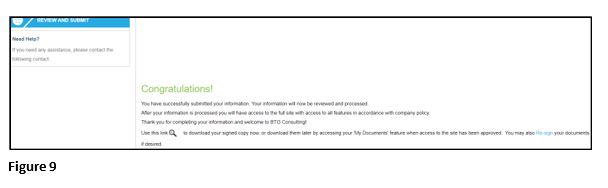
After this has been done, the employee’s information will be sent through the system and the status of each task will reflect on company’s Onboarding Dashboard (Figure 9). If needed, the employee can access the ESS kiosk any time after hitting Complete to make changes to some of completed tasks and to re-sign your documents, as long as company’s onboarding department has not already completed their tasks of converting them from a new hire to an employee in their system.
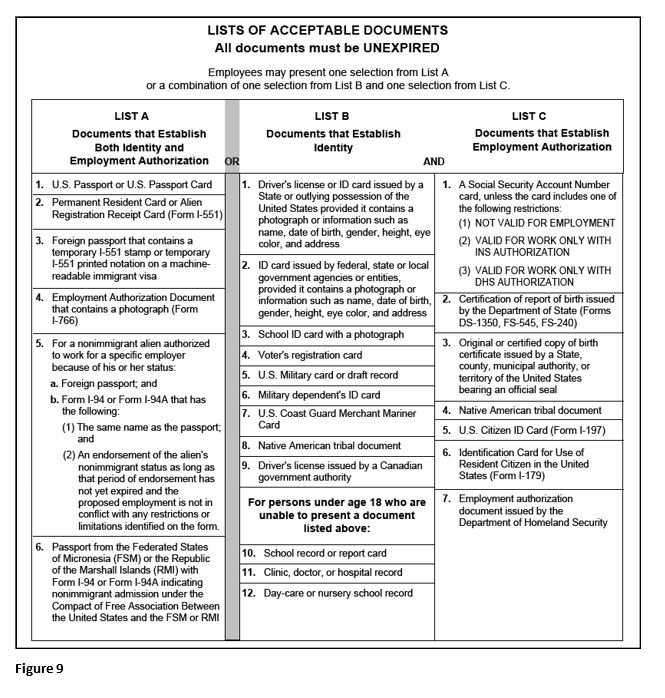
I-9 Form List of Acceptable Documents
Below is a list of acceptable documents you must present to the company within 3 business days of your first day of employment. You may present one selection from List A OR a combination of one selection from List B and one selection from List C (Figure 10).