How to Set Up WIFI on the IT3200
Summary
This document addresses work instructions for managers on how to set up Wi-Fi on the IT3200.
Connecting to Wi-Fi
1. Click the hash sign (#) to access the clock menu. Note: If the clock menu is associated with authority level, enter the password (Figure 1).

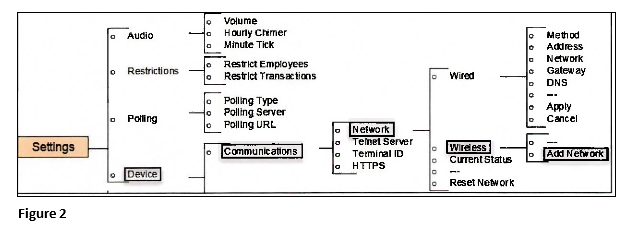
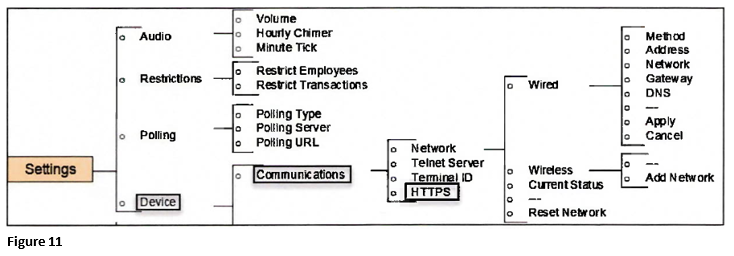
2. Access Settings, Device, Communications, Network, Wireless and Add Network. All available networks are displayed (Figure 2).
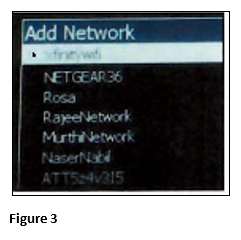
3. Select your wireless network from the list. The menu option for the selected wireless network is displayed (Figure 3).
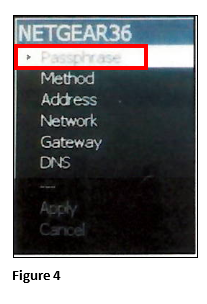
4. Select Passphrase from the menu (Figure 4).
5. Enter the password of the selected wireless network in the Passphrase field (Figure 5).
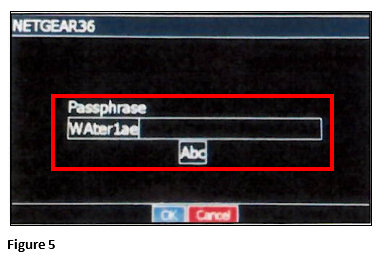
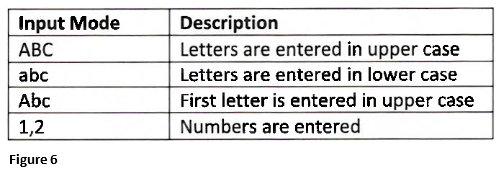
Note: Use F2 to cycle through various input modes that are described in the following table (Figure 6).
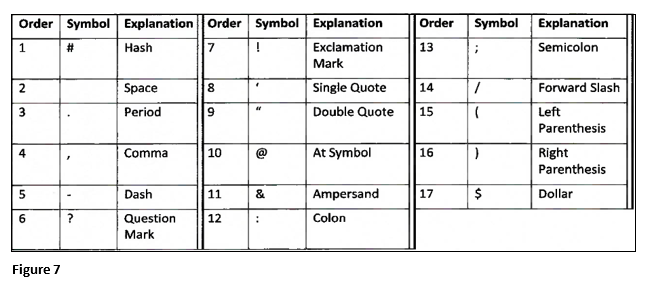
6. To enter the special characters contained in the password of your selected wireless network, press the hash sign (#) to cycle through special characters in the following table. The highlighted special character is populated in the Passphrase field automatically (Figure 7).
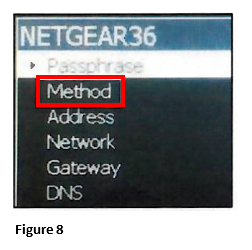
7. Select Method. There are three options for the Method field: DHCP, Manual and Off. Select DHCP or Manual. Note: DHCP is selected by default (Figure 8).
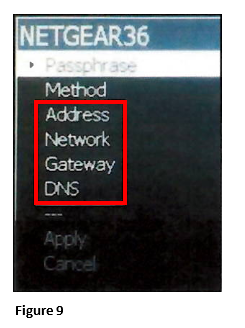
8. If Manual is selected, specify the IP address, IP mask, IP gateway, and DNS IP address of the clock in the Address, Network, Gateway and DNS fields (Figure 9).
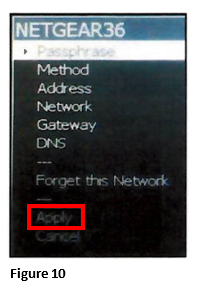
9. Click Apply to save the selected network communication method and its settings for the clock (Figure 10).
10. (Optional): To add more wireless networks, repeat step 2-7. The clock connects to the networks in the order appear in the list, so networks added earlier are preferred.
11. Select menu options Access Settings, Device, Communications, and HTTPS. There are three options available: HTTPS, HTTPS (No Trust) and HTTP. Select HTTPS. Note: HTTPS is selected by default (Figure 11).
The HTTPS (No Trust) option is used in the following cases:
- The Push (Local) polling type and self-signed certificate or the certificate issued by an internal CA is used.
- The certificates in the clock are not updated and enabling HTTPS prevents the clock from performing the synchronization and version update operations.
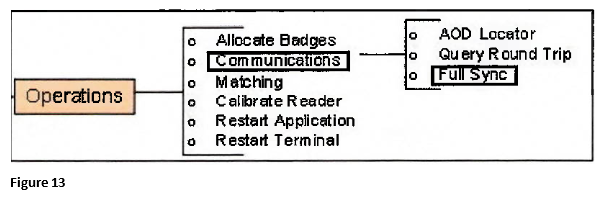
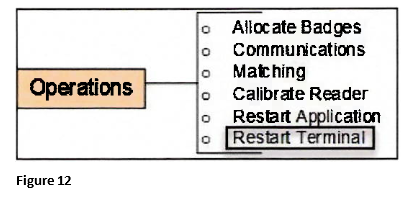
12. Access Operations and Restart Terminal to reboot the clock (Figure 12).
13. After the other clock settings are completed, either press the F8 key or from the menu access Operations, Communications and Full Sync to perform the Full Synchronization operation (Figure 13).